Building Your Dream 10x12 Pallet Shed on a Budget
Dreaming of a spacious, organized outdoor storage solution without breaking the bank? A 10x12 pallet shed is the perfect answer! This detailed guide walks you through every step, transforming reclaimed pallets into a functional and surprisingly attractive structure. Get ready to unleash your inner builder and save a fortune in the process!
Phase 1: Planning and Preparation
Before you even touch a pallet, thorough planning is crucial. This phase ensures a smooth build and prevents costly mistakes. First, secure necessary permits from your local authority. Regulations vary, so don't skip this step! Next, choose your location carefully. Consider proximity to power sources (if needed), drainage, and sunlight exposure. Level the ground using a shovel and rake, creating a firm, even base. Measure twice, cut once â€" this old adage is your best friend here!
Gathering Your Materials
Source your pallets responsibly! Inspect them for rot, damage, and protruding nails. Aim for heat-treated pallets (stamped HT) for safety. You'll need approximately 30-40 pallets for a 10x12 shed, depending on the pallet size and your design. In addition to pallets, acquire these essential materials: strong screws (exterior grade), pressure-treated lumber for the base and framing, roofing materials (metal sheeting is cost-effective and durable), a sturdy door kit, and any desired hardware (hinges, handles, etc.). Remember to factor in tools like a saw, hammer, drill, level, and measuring tape.
Phase 2: Constructing the Foundation
A solid foundation is the cornerstone of a long-lasting shed. Begin by building a perimeter frame from pressure-treated lumber, anchored into the ground using concrete posts or metal stakes. This frame will provide stability and support for your pallet walls. Ensure the frame is perfectly square and level using your level and measuring tape, making adjustments as needed. This extra effort will save you headaches later.
Building the Floor
While optional, a floor adds considerable durability and protection from moisture. Create a simple floor using additional pressure-treated lumber, creating a grid pattern within your frame. Secure the floorboards tightly, ensuring a level surface for the pallets to rest on. This prevents warping and improves the overall structural integrity of your shed.
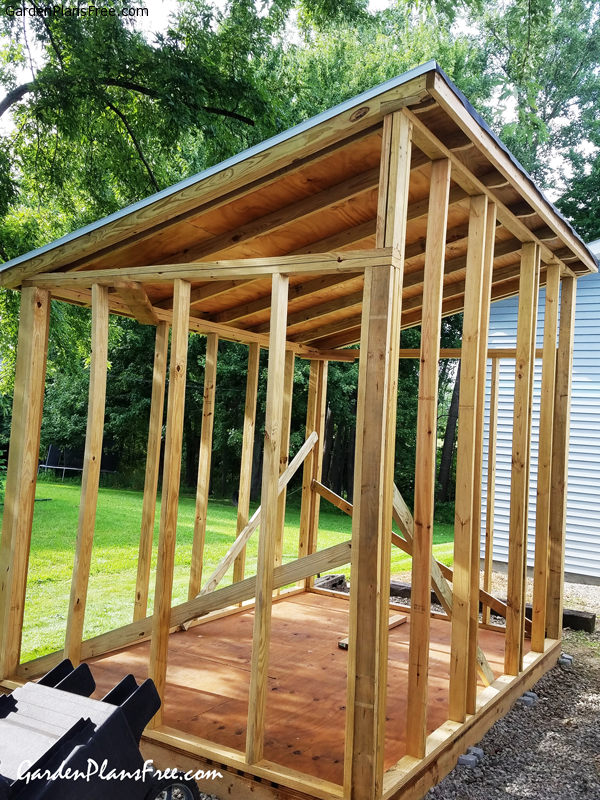
Phase 3: Erecting the Pallet Walls
This is where the magic happens! Begin assembling your pallet walls. You may need to disassemble some pallets to create appropriately sized sections for your walls. Carefully secure the pallets to each other and to the base frame using strong screws. Be mindful of alignment â€" maintaining straight vertical lines is key. Remember safety first! Always wear safety glasses and gloves to prevent injuries from nails and splinters.
Adding a Door and Windows
Create openings for a door and any desired windows. This will require cutting some pallets, so carefully plan the placement of your openings to avoid structural compromise. Install a pre-made door kit or build your own using more pressure-treated lumber. Securely attach the door using hinges and a handle. Adding windows improves ventilation and light within your shed.
Phase 4: Roofing and Finishing Touches
The roof completes your shed and provides crucial protection. Create a simple gable roof using more pressure-treated lumber. Ensure a sufficient overhang to protect the walls from rain. Cover the roof with your chosen roofing material, carefully following the manufacturer's instructions. Finally, seal any gaps or cracks with exterior-grade sealant to protect your shed from the elements and ensure its longevity.
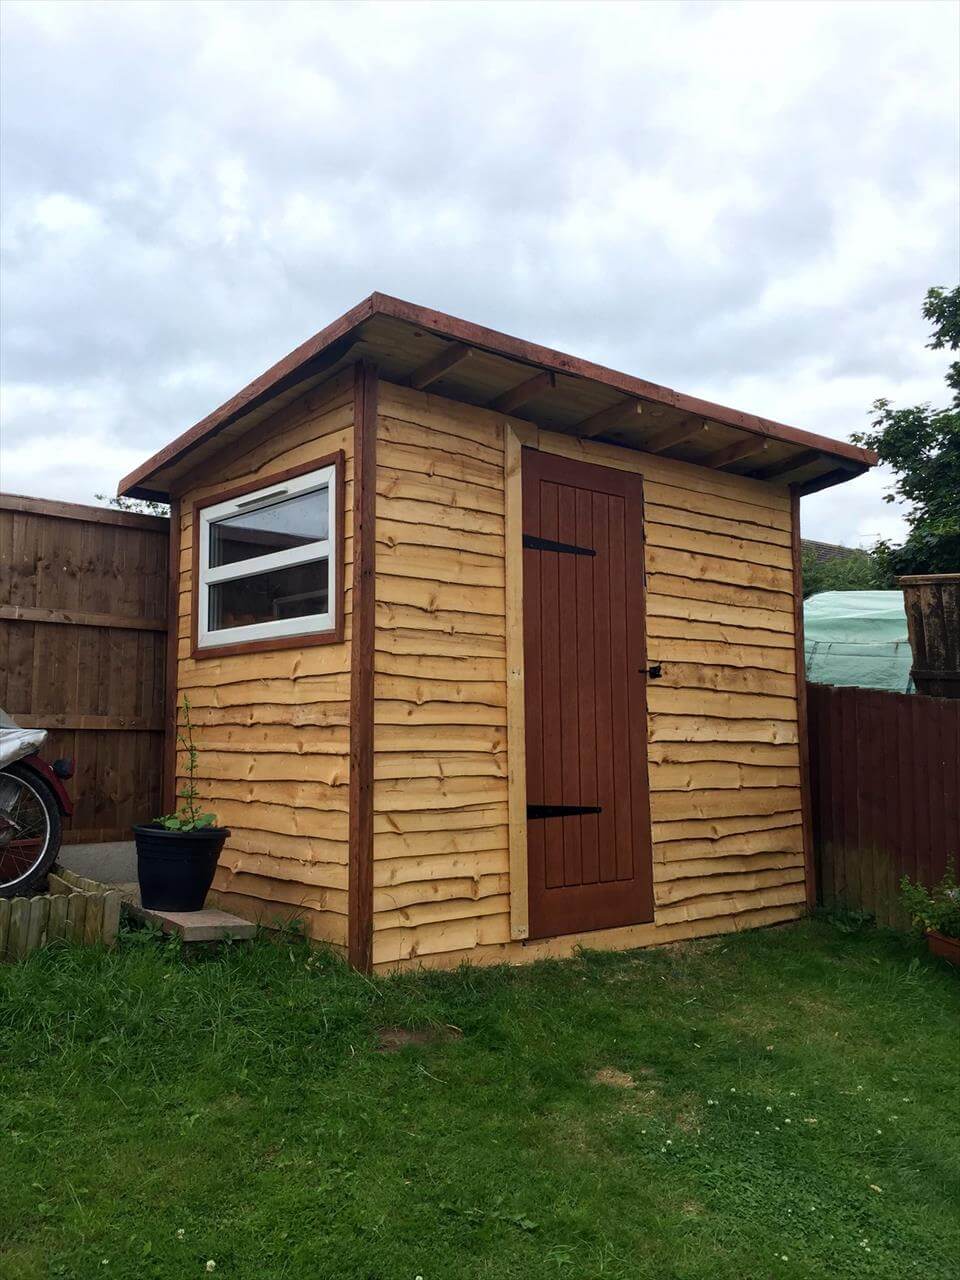
Finishing Details
Once the roof is in place, add the final touches. Consider painting your shed for added protection and aesthetic appeal. Choose a weather-resistant paint to maximize its lifespan. Finally, organize the interior of your shed to optimize storage space and functionality. Your budget-friendly 10x12 pallet shed is now ready to serve you for years to come!
Disclaimer: Always prioritize safety when working with tools and construction materials. This guide provides general advice; consult professional resources for detailed construction techniques and safety precautions.